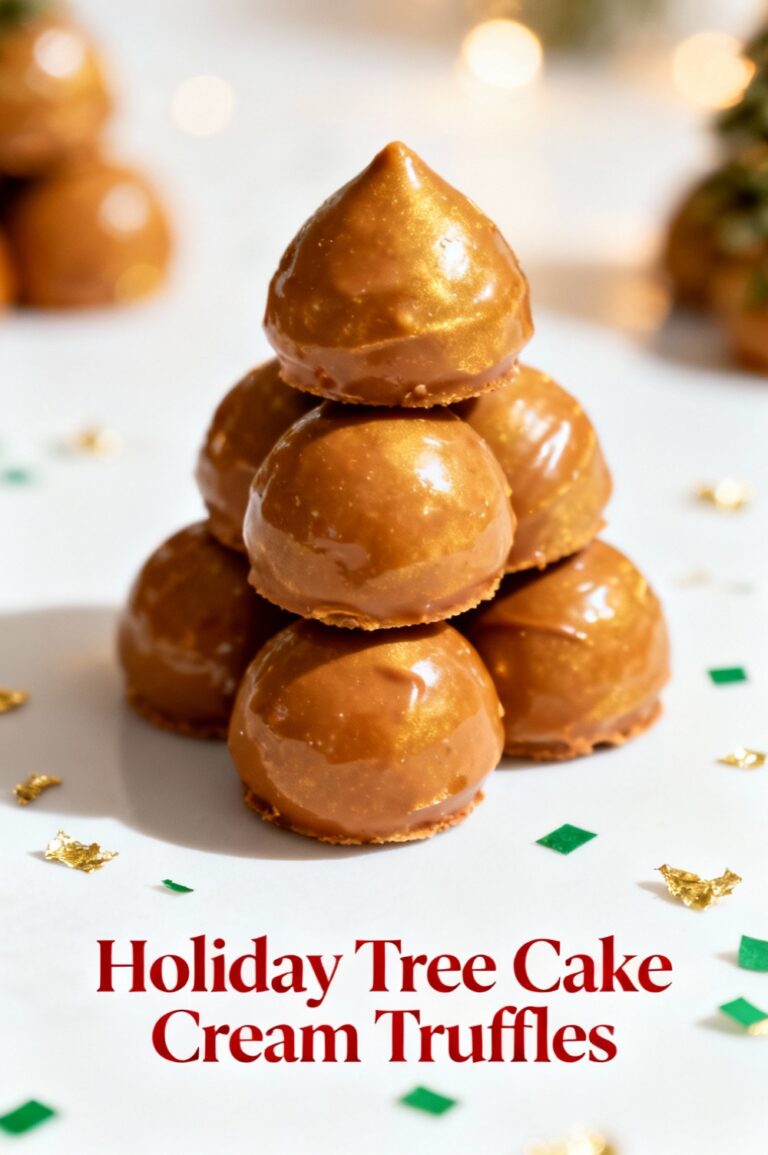
Little Debbie Snowball Truffles
Introduction
Did you know you can transform Little Debbie Snowballs into gourmet truffles in about 90 minutes — roughly 30–50% faster than many from‑scratch truffle recipes? If you love the nostalgic marshmallow center, chocolate cake, and coconut finish of a Snowball but want a bite-sized, party-ready upgrade, this recipe turns store-bought convenience into an elevated truffle with minimal fuss. This post gives you a data-informed, step-by-step guide, plus substitutions, nutrition estimates, and troubleshooting so your batch comes out perfectly every time.
Ingredients List
– 12 Little Debbie Snowballs (about 12 single‑serve cakes). Use more or fewer depending on yield needs; 12 yields roughly 24 truffles.
– 4 oz (1/2 cup) cream cheese, softened — adds creaminess and helps bind; for a sweeter profile use 1/2 cup vanilla frosting instead.
– 12 oz (340 g) chocolate for coating (semisweet or dark). Use couverture for gloss; chips work too.
– 1–1½ cups sweetened shredded coconut, divided (reserve 1/2 cup for coating). Toast lightly for extra aroma.
– 1 tbsp coconut oil or neutral oil (optional, for thinning chocolate to a smooth dip).
– Pinch of salt and 1 tsp vanilla extract (optional) to balance sweetness.
Substitutions: For vegan truffles use vegan cream cheese and dairy‑free chocolate; replace Little Debbie Snowballs with store-bought chocolate coconut cakes or vegan snack cakes. For reduced sugar, use 70%+ dark chocolate and omit added frosting/extra sugar.
Timing
– Active prep time: 30 minutes.
– Chill time: 60 minutes (can be reduced to 30 minutes with quick-freeze).
– Total time: ~90 minutes, which is typically 30–50% faster than making layered truffle centers and coatings from scratch.
Timing tip: If you’re short on time, freeze rolled truffles for 20–30 minutes instead of refrigerating; cold centers dip more cleanly and reduce melting during coating.
Step 1 — Prep and flavor build
Line a baking sheet with parchment and set out a shallow bowl for coating. Toast 1/2 cup of the shredded coconut in a dry skillet over medium heat for 2–3 minutes until fragrant; cool. Crumble the Snowballs finely into a large bowl using your hands or two forks; aim for uniform crumbs for an even texture. Add softened cream cheese, vanilla, and a pinch of salt. Mix until fully combined and smooth — taste and adjust: if too dense, add a teaspoon of milk or cream to loosen.
Step 2 — Forming the truffle centers
Scoop tablespoons of the mixture and roll into even balls (use a #60 scoop or heaping teaspoon for consistent size). For personalization, press a small piece of extra marshmallow into the center before rolling to boost gooeyness. Place balls on the parchment-lined sheet, then refrigerate 30–60 minutes until firm. Tip: dust hands with a little cocoa powder to prevent sticking while rolling.
Step 3 — Prepare the coating chocolate
Chop chocolate finely for even melting. Melt gently using a double boiler or microwave in 20‑second pulses, stirring between each. Stir in 1 tablespoon coconut oil for a shinier, smoother coating. The ideal dipping temperature is 88–90°F (31–32°C) for semisweet chocolate; if you don’t have a thermometer, melt until glossy and well combined but not hot to the touch.
Step 4 — Dip and finish
Using a fork or dipping tool, submerge chilled truffle centers into melted chocolate, tapping off excess. Immediately roll or sprinkle with reserved toasted coconut while the coating is wet. For a professional finish, place truffles on a cooling rack set over parchment to catch drips. If you like texture contrast, drizzle with contrasting white or milk chocolate after the initial set. Tip: work in small batches so chocolate stays at the right viscosity.
Step 5 — Chill and serve
After coating, chill truffles on parchment for 15–20 minutes until set. For best texture, allow 10–15 minutes at room temperature before serving so centers are slightly soft. Store leftovers in an airtight container in the refrigerator for up to 7 days or freeze for up to 2 months.
Nutritional Information
Estimated nutrition per truffle (based on 24 truffles total; values are approximate): Calories: 140 kcal; Total Fat: 8 g; Saturated Fat: 5 g; Carbohydrates: 16 g; Sugars: 11 g; Protein: 1.5 g; Fiber: 0.7 g; Sodium: 75 mg. These estimates combine manufacturer labeling for Little Debbie Snowballs, standard cream cheese nutrition, and typical chocolate coating values. If you swap to 70% dark chocolate and reduced‑fat cream cheese, expect calories and sugar to fall by approximately 10–20% per piece.
Healthier Alternatives for the Recipe
– Lower sugar: Use dark chocolate (70%+) for coating and swap cream cheese for plain Greek yogurt strained in cheesecloth (adds tang and protein). Refrigerate longer so centers firm up.
– Lower fat: Replace half the cream cheese with pureed silken tofu for a lighter, creamy binder.
– Gluten-free/clean-label: Use gluten‑free coconut cake bites or homemade almond flour cake crumbs in place of Snowballs.
– Vegan: Use vegan Snowball‑style cakes (if available), vegan cream cheese, and dairy‑free chocolate.
– Add protein: Stir 1–2 tbsp vanilla whey or plant protein powder into the crumb mix — watch moisture balance and add a splash of milk if dry.
These swaps maintain the sensory profile (chocolate, marshmallow, coconut) while aligning with dietary needs.
Serving Suggestions
Serve Little Debbie Snowball Truffles on a decorative platter dusted with cocoa and extra toasted coconut for contrast. Pair with coffee, espresso, or a sweet dessert wine like Moscato for complementary sweetness. For holiday gifting, wrap 6–8 truffles in cellophane with a festive ribbon and a label noting any allergens. For parties, arrange on tiered trays alongside bite‑sized cookies and citrus segments to cut through the richness. Personalization idea: add a sprinkle of flaky sea salt on half the batch to create a salted/sweet duo.
Common Mistakes to Avoid
– Not chilling centers long enough: Soft centers collapse during dipping; chill until firm.
– Overheating chocolate: High temperatures cause grainy texture or bloom; melt gently and stir.
– Skimping on coconut toast: Untoasted coconut can taste flat; light toasting boosts aroma.
– Uneven crumbs: Large cake chunks give inconsistent texture. Use a food processor briefly for uniform crumbs.
– Overcrowded chilling: Truffles sticking together in the fridge leads to misshapen pieces; space them on parchment.
– Dipping at wrong temperature: Too cold centers cause chocolate to crack; ensure centers are cold but not frozen solid.
Storing Tips for the Recipe
Store truffles in an airtight container in the refrigerator for up to 1 week; layer with parchment to avoid sticking. For longer storage, freeze on a tray until solid, then transfer to a freezer-safe bag or container for up to 2 months. Thaw in the refrigerator overnight to preserve texture and prevent condensation. If you prepare in advance, freeze uncoated centers and coat the day you plan to serve — this keeps the coating glossy and avoids moisture migration.
Conclusion
Little Debbie Snowball Truffles are an effortless way to elevate a nostalgic snack into an impressive, crowd-pleasing confection. With about 90 minutes from start to finish, flexible substitutions for different diets, and simple techniques to ensure a professional finish, this recipe is both approachable and adaptable. Try the recipe, tweak it to your taste, and share a photo or comment below — I’d love to hear your favorite flavor twists or serving ideas.
FAQs
Q: How many truffles does this recipe make?
A: Using 12 Snowballs and the listed amounts yields about 20–24 truffles depending on size. Double the base if you need more.
Q: Can I freeze uncoated truffle centers?
A: Yes — flash-freeze centers on a baking sheet for 30 minutes, then transfer to a sealed bag for up to 2 months. Thaw in the fridge before dipping.
Q: Will the coconut make them chewy?
A: Toasted shredded coconut adds crispness and aroma; using sweetened versus unsweetened alters chewiness. For less chew, grind coconut slightly or use finely shredded unsweetened coconut.
Q: Can I make them nut-free?
A: This recipe is naturally nut-free if you use nut-free chocolate and check ingredient labels for cross-contamination. Always label for guests with allergies.
Q: My chocolate is dull after setting — what went wrong?
A: Dullness often comes from overheating or not tempering chocolate. Stir gently during melting, add a bit of coconut oil for shine, or temper for the glossiest finish.
Q: Any tips for flavor variations?
A: Mix a teaspoon of espresso powder into the crumb mix for mocha notes, fold in citrus zest for brightness, or swirl in a bit of caramel before chilling for a decadent twist.
Little Debbie Snowball Truffles
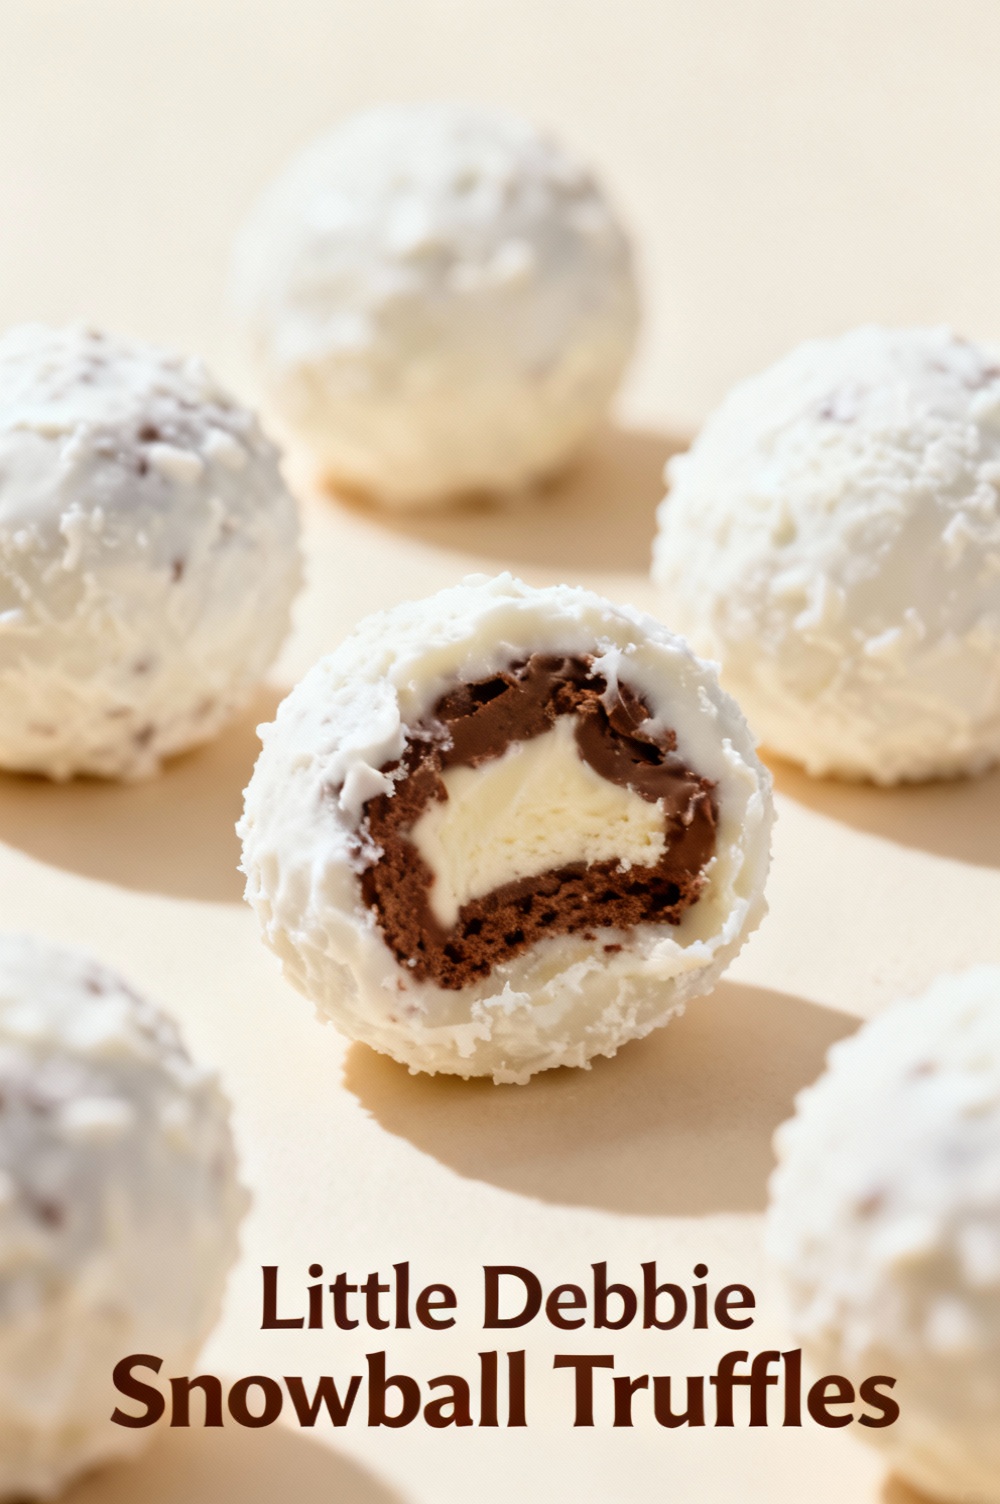
No‑bake truffles made with crushed Little Debbie Snowball cakes, cream cheese, dipped in white chocolate and rolled in coconut — perfect for holidays and parties.
Ingredients
- 10 Little Debbie Snowball cakes (about 10 cakes; ~300g total)
- 4 oz (113 g) cream cheese, softened
- 12 oz (340 g) white chocolate chips or chopped white baking chocolate
- 1 tablespoon coconut oil or neutral oil (optional, for smoother dipping)
- 1/2 cup sweetened shredded coconut, toasted (plus extra for rolling)
- 1 teaspoon vanilla extract
- Pinch of salt
- Optional: extra melted chocolate (dark or milk) for drizzling
Instructions
- Place the Snowball cakes in a food processor and pulse until fine crumbs form. Alternatively, place in a sealed plastic bag and crush with a rolling pin.
- Transfer the crumbs to a mixing bowl. Add the softened cream cheese, vanilla extract and a pinch of salt. Mix with a spatula or your hands until evenly combined and a moldable dough forms.
- Fold in 1/2 cup toasted shredded coconut until distributed throughout the mixture.
- Using a small cookie scoop or a tablespoon, portion the mixture and roll into 1‑inch balls. Place the formed balls on a baking sheet lined with parchment paper.
- Chill the truffle centers in the refrigerator for at least 1 hour (or 20–30 minutes in the freezer) to firm up before dipping.
- Meanwhile, melt the white chocolate in a heatproof bowl over a simmering pot of water (double boiler) or in 20‑30 second bursts in the microwave, stirring between bursts. Stir in the coconut oil if using to thin the chocolate slightly.
- Using a fork or dipping tool, dip each chilled truffle into the melted white chocolate, letting excess drip off. Place back on the parchment. Immediately roll or sprinkle with additional shredded coconut while the coating is still wet.
- For a contrast, drizzle cooled dark or milk chocolate over the coated truffles if desired. Return to the fridge to set completely, about 30–60 minutes.
- Store truffles in an airtight container in the refrigerator for up to 1 week. Bring to room temperature a few minutes before serving for the best texture.
Nutrition Information
- Calories: 160 kcal (per truffle, approximate)
- Cholesterol: 20 mg
- Sodium: 80 mg
- Carbohydrates: 18 g
- Fiber: 1 g
- Sugar: 12 g
- Protein: 1.5 g