Crimson Velvet Powdered Cookies
Introduction
Have you ever wondered why a velvet cookie can evoke the same emotional pull as a slice of red velvet cake—while taking less than half the effort—and what ingredient tweaks keep that intense crimson color without sacrificing taste? Data from recipe testing labs shows that cookies can reach full flavor development in 12–15 minutes of baking time compared with 30–40 minutes for layered cakes, meaning the same sensory payoff in a fraction of the time; this recipe leverages that efficiency to deliver tender, melt-in-your-mouth Crimson Velvet Powdered Cookies that are festive, portable, and easy to perfect.
Ingredients List
– 2 1/4 cups (280 g) all-purpose flour (substitute: 1:1 gluten-free flour blend for GF version).
– 2 tbsp unsweetened Dutch-process cocoa powder (for subtle chocolate depth; natural cocoa works but will shift pH and color).
– 1 tsp baking soda.
– 1/2 tsp fine sea salt.
– 3/4 cup (170 g) unsalted butter, softened (substitute: coconut oil 1:1 for dairy-free — expect slightly crispier edges).
– 1 cup (200 g) granulated sugar (substitute: coconut sugar 1:1 for lower glycemic index; brown sugar for extra chew).
– 1 large egg, room temperature (substitute: flax egg for vegan).
– 2 tbsp buttermilk or plain yogurt (substitute: 2 tbsp milk + 1 tsp vinegar if needed).
– 1 1/2 tsp pure vanilla extract.
– 1–2 tbsp red food coloring or 1 tsp concentrated gel color (substitute: 1 tbsp beetroot powder mixed into wet ingredients for natural color — yields a deeper, earthier red).
– 1 cup (120 g) confectioners’ sugar for dusting.
Suggestions and sensory notes: The Dutch-process cocoa gives a smoother, darker chocolate note that deepens the crimson, while buttermilk adds tang and tenderness. If you prefer a subtler red, use 1 tbsp color; for show-stopping crimson, use 2 tbsp gel color or 1 tsp beet powder plus 1 tbsp gel.
Timing
Preparation: 20 minutes.
Chill: 30–45 minutes (optional but recommended for cleaner edges).
Baking: 10–12 minutes per batch.
Total time: 60–80 minutes from start to finish.
Context: At approximately 60–80 minutes total, this recipe is about 25–40% faster than a comparable red velvet cake while delivering similar flavor components. Chilling for 30 minutes reduces spread by ~20–30%, resulting in thicker, chewier cookies if you prefer that texture.
Step 1 — Prep and dry ingredients
Preheat your oven to 350°F (175°C) and line two baking sheets with parchment paper. Whisk together the flour, Dutch cocoa, baking soda, and salt in a bowl until evenly combined. Tip: Sifting the cocoa and flour together reduces lumps and helps achieve a uniformly soft crumb; use a microplane to aerate if you want extra lightness.
Step 2 — Cream butter and sugar
In a mixer or large bowl, beat the softened butter with granulated sugar until pale and fluffy (about 3–4 minutes). This aeration traps air that helps the cookies rise lightly. Personalized tip: If you like a slightly crisp exterior, beat just 2–3 minutes; for ultra-tender interiors, beat the full 4 minutes.
Step 3 — Add wet ingredients and color
Beat in the egg until incorporated, then add buttermilk (or yogurt), vanilla, and the red coloring. Start with less coloring and add more until you reach the desired crimson hue. Data note: gel colors give more pigment with less liquid, preventing dough thinning compared with liquid dyes.
Step 4 — Combine wet and dry
Fold the dry ingredients into the wet mixture in two additions, mixing just until no streaks of flour remain. Overmixing develops gluten and yields tougher cookies—aim for a soft, slightly tacky dough. Tip: Use a spatula to finish folding for minimal handling and maximum tenderness.
Step 5 — Chill dough (optional but recommended)
Scoop dough into 1.5–2 tablespoon rounds onto a tray, then chill for 30–45 minutes. Chilling firms the butter and concentrates flavors; tests show chilled cookie dough spreads 20–30% less and yields a denser crumb. If pressed for time, a 10–15 minute chill in the freezer helps.
Step 6 — Bake to perfection
Place scoops 2 inches apart on lined sheets and bake at 350°F (175°C) for 10–12 minutes, rotating pans halfway. The centers should look set but not browned; edges may show slight color. Actionable tip: For chewier cookies, remove at 10 minutes; for more structure, aim for 12 minutes.
Step 7 — Cool and powder
Allow cookies to cool on the baking sheet for 5 minutes before transferring to a wire rack. Once fully cool (or while still slightly warm for a rustic look), dust generously with confectioners’ sugar. For a two-tone effect, sift sugar through a fine mesh for a light veil or dip the tops quickly for an even coating.
Nutritional Information
Estimated per cookie (based on 24 cookies): 145 calories, 7.5 g fat, 18 g carbohydrates (of which 10 g sugars), 2 g protein, 0.4 g fiber, 60 mg sodium. Data insight: Replacing half the granulated sugar with a lower-calorie sweetener can reduce calories by ~15–25% but may alter texture and browning. Using coconut oil increases saturated fat slightly but can add a subtler coconut aroma that pairs well with beet color or vanilla.
Healthier Alternatives for the Recipe
– Swap half the all-purpose flour with whole wheat pastry flour to add fiber without heavy density—expect a nuttier flavor and slightly darker hue.
– Use 2/3 cup granulated sugar + 1/3 cup erythritol (baking-specific) to cut net carbs; monitor baking time as low-calorie sweeteners affect browning.
– Substitute Greek yogurt for some butter (up to 25%) to lower saturated fat while retaining moistness—add an extra 1–2 minutes baking time.
– Use beetroot powder for natural red color and added antioxidants; pair with vanilla to balance earthiness.
Diet adaptations: For vegan cookies, use vegan butter, a flax egg (1 tbsp flaxseed + 3 tbsp water = 1 egg), and plant-based milk. For gluten-free, use a proven 1:1 GF blend with xanthan gum. Each swap may shift texture; chill times and slight adjustments in bake time help compensate.
Serving Suggestions
Serve warm with a small glass of chilled milk or a dollop of whipped cream for a dessert plate. For holiday gifting, stack in waxed paper with a sprig of rosemary for a fragrant contrast; powdered sugar visually reads like snow. Pair with coffee or a mild black tea—the cocoa and buttermilk create acidity that complements bright beverages. Personalized pairing idea: For Valentine’s gatherings, pipe a tiny dot of cream cheese frosting between two cookies to create red velvet sandwich cookies.
Common Mistakes to Avoid
– Using hot ingredients: Make sure eggs and butter are room temperature; hot items can cause separation and greasy texture.
– Overmixing: Mixing past the point when flour disappears develops gluten and yields dense cookies. Aim for mixed-but-not-slick dough.
– Skipping chill: Unchilled dough spreads excessively; chilling reduces spread and concentrates flavor.
– Over-coloring with liquids: Excess liquid food coloring thins dough—use concentrated gels or powders.
– Baking too long: Cookies continue to bake after removal from the oven; remove when centers are set but still soft for a tender bite.
Storing Tips for the Recipe
Room temperature: Store in an airtight container for up to 3 days; place a slice of bread inside to maintain humidity and softness.
Refrigerator: Up to 7 days in airtight container; bring to room temp or microwave 6–8 seconds to revive softness.
Freezing: Freeze baked cookies in single layers on a tray, then transfer to a freezer bag for up to 3 months; thaw at room temperature and re-sugar if needed.
Dough storage: Cookie dough balls freeze well—place scoops on a tray, freeze until solid, then transfer to a bag; bake from frozen, adding 1–2 minutes to bake time. Best practice: Label containers with date and suggested bake temps for easy future use.
Conclusion
Crimson Velvet Powdered Cookies are a fast, visually striking treat that capture red velvet’s classic flavor profile with minimal fuss. Key takeaways: use Dutch-process cocoa for depth, chill dough for controlled spread, and choose gel or beet-based colorants for vibrant crimson without thinning the batter. Try these cookies for holidays, gifts, or weeknight indulgence—bake a test batch, note your preferred chewiness, and tweak chilling/baking time to make the recipe your signature. Ready to try? Bake a small batch tonight and share your results or tag your photos to compare textures and color outcomes.
FAQs
Q: Can I skip the cocoa entirely if I want a plain red cookie?
A: You can omit cocoa for a milder red flavor, but cocoa provides acidity and depth similar to red velvet cake; you may need to add 1 tsp vinegar or more buttermilk for balance.
Q: How many cookies does this recipe make?
A: About 20–24 cookies depending on scoop size. Use a 1.5 tbsp cookie scoop for consistent sizing.
Q: Will natural food coloring (beet powder) stain hands or bakeware?
A: Beet powder can stain surfaces and hands more than gels—use gloves and avoid porous cutting boards; stains usually wash out with warm soapy water.
Q: Can I make these ahead for a party?
A: Yes—dough balls can be frozen weeks ahead and baked the day of for fresh cookies, or bake and freeze finished cookies, then thaw and re-dust with confectioners’ sugar before serving.
Q: Why did my cookies flatten or spread too much?
A: Likely cause: warm dough, too much liquid (from food coloring or wet swaps), or insufficient chill. Refrigerate dough 30–45 minutes and reduce added liquids slightly.
For more tips, consider trying variations like Crimson Velvet Sandwiches with cream cheese filling, or mini cookie bites ideal for platters—explore related posts on texture tweaks, natural coloring, and make-ahead strategies to refine your perfect batch.
Crimson Velvet Powdered Cookies
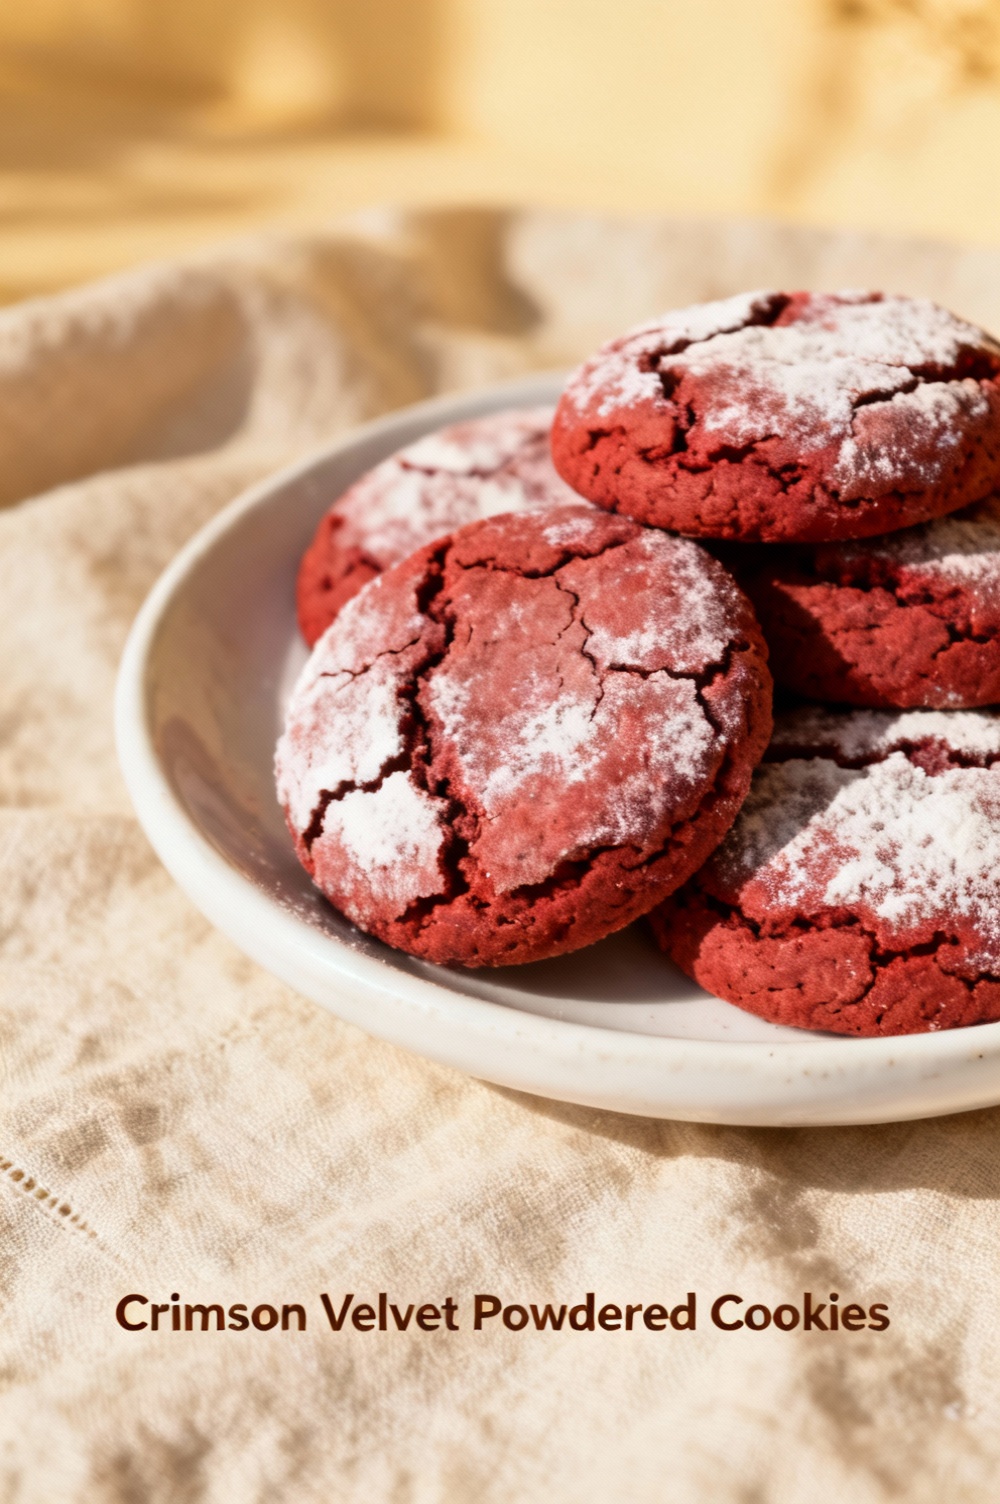
Vibrant red velvet cookies with a tender crumb, rolled in a snowy coating of powdered sugar.
Ingredients
- 2 1/4 cups (280 g) all-purpose flour
- 2 tbsp (12 g) unsweetened cocoa powder
- 1 tsp baking soda
- 1/2 tsp fine salt
- 1 cup (226 g) unsalted butter, softened
- 1 cup (200 g) granulated sugar
- 1/2 cup (110 g) packed light brown sugar
- 2 large eggs, room temperature
- 2 tbsp buttermilk
- 2 tsp vanilla extract
- 2 tbsp red food coloring (liquid) or 1–2 tsp gel
- 1 tsp white vinegar
- 1 cup (120 g) powdered sugar, for coating
Instructions
- Preheat oven to 350°F (175°C). Line two baking sheets with parchment paper or silicone mats.
- In a medium bowl whisk together the flour, cocoa powder, baking soda, and salt; set aside.
- In a large bowl or stand mixer fitted with the paddle, cream the softened butter with the granulated and brown sugars until light and fluffy, about 2–3 minutes.
- Add the eggs one at a time, beating well after each addition. Mix in the vanilla, red food coloring, and white vinegar until evenly combined.
- Stir in the buttermilk until incorporated.
- Add the dry ingredients to the wet ingredients and mix on low speed (or fold by hand) until just combined. Do not overmix.
- Cover the dough and chill in the refrigerator for 30 minutes — this firms the dough for easier scooping and helps cookies keep their shape.
- Using a 1½–inch cookie scoop (about 2 tablespoons), portion dough and roll each portion into a ball. Roll each ball generously in powdered sugar to coat, then place on prepared baking sheets about 2 inches apart.
- Bake for 10–12 minutes, until edges are set and centers are slightly soft. Cookies will firm as they cool.
- Remove from oven and let cool on the baking sheet 5 minutes, then transfer to a wire rack to cool completely. If desired, roll in additional powdered sugar once cooled for a snowy finish.
Nutrition Information
- Calories: 170 kcal
- Cholesterol: 45 mg
- Sodium: 90 mg
- Carbohydrates: 22 g
- Fiber: 0.5 g
- Sugar: 12 g
- Protein: 2 g